What is One Point Perspective?
One point perspective is a type of linear perspective. Linear perspective relies on the use of lines to render objects leading to the illusion of space and form in a flat work of art. It is a structured approach to drawing. One point perspective gets its name from the fact that it utilizes a single vanishing point.
Other forms of linear perspective include two point perspective and three point perspective. Each type gets its name according to how many vanishing points are used. The scene usually dictates which type of perspective is used by the artist.
It should be noted that not all forms of perspective are linear. Atmospheric perspective is used to create the illusion of space by manipulating the use of value and color in a scene. Often atmospheric perspective is used in tandem with a form of linear perspective to create a convincing illusion.
Although linear perspective is an effective way to create depth in a scene, it is only one of the six techniques an artist can use to create the illusion of space.
The Horizon Line
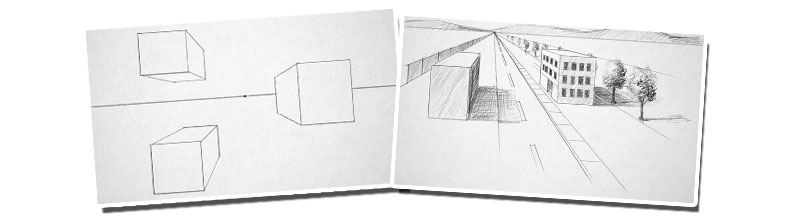
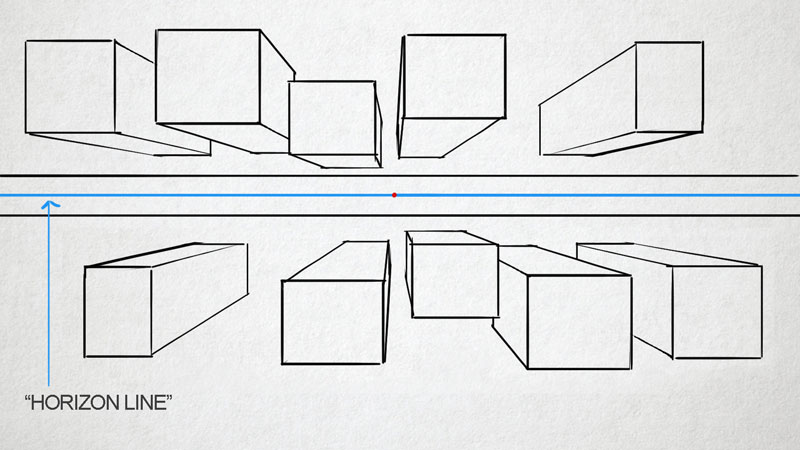
One point perspective assumes that a viewer is at a certain vantage point and that there is a real or theoretical "horizon line" present. The "horizon line" is sometimes described as the line that divides the ground from the sky.
The horizon line is not always clearly defined by "sky" and "ground", however. The horizon line can also be the vantage point from which a viewer is observing. For example, the viewer may see an object by looking up at it or perhaps directly down upon it. The object will still be viewed in perspective, but the "horizon line" is not the dividing space between "sky" and "ground" in these situations.
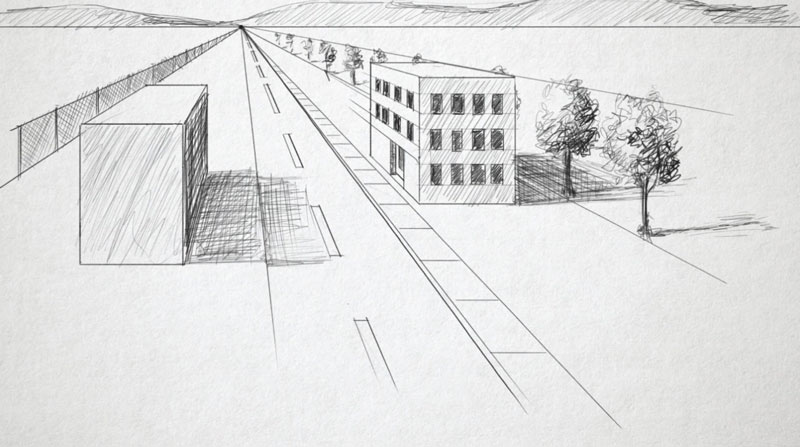
In the following image, the viewer could be looking down onto buildings. In this case, the horizon line does not mark the division between "sky" and "ground"
Understanding the horizon line helps the artist make an informed decision on where the vanishing point or points should be placed. A drawing or painting can be created without a horizon line, but its good practice to include one even though it may not be visible in the finished work.
The Vanishing Point
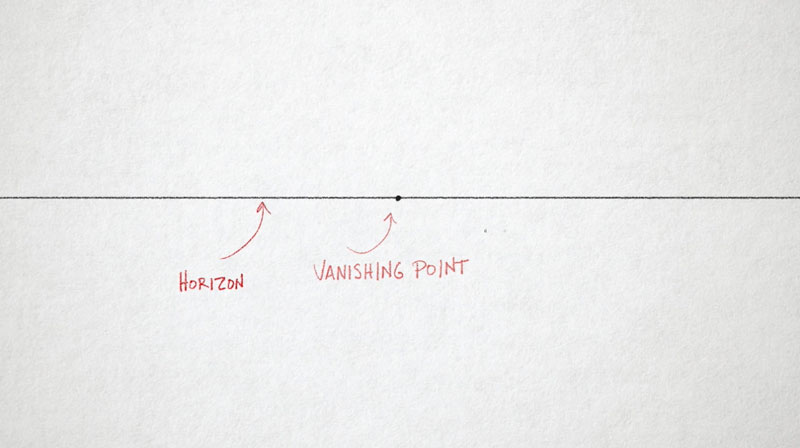
Dots placed on the horizon are called the "vanishing points". One point perspective utilizes one vanishing point. All of the lines of perspective will recede back to this singular dot in space. This dot can best be thought of as the place where objects begin to disappear because of distance. Some of the lines used in one point perspective will use the "vanishing point" as an anchor.
Orthogonals
Once the basic shape of the object is defined, lines that recede back to the vanishing point are added from each corner of the object. These diagonal lines are called orthogonals.
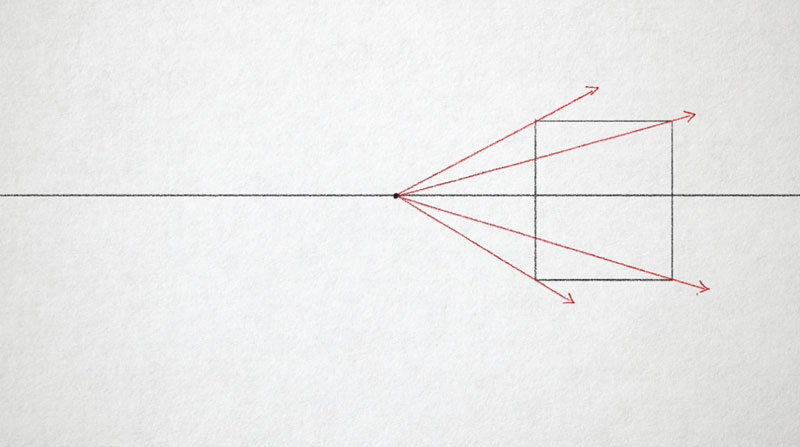
The back "face" of the cube is added by drawing another square that touches all four orthogonals as they recede back in space.
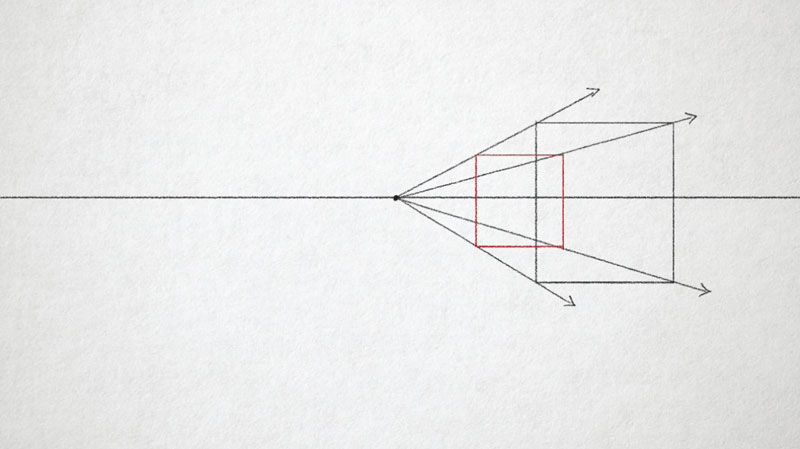
The shape of the cube has now been defined and the lines that were used to draw it can be erased, revealing a three dimensional cube in space.
This process is simply replicated to create additional forms. Each form that is drawn utilizes the same vanishing point. A new vanishing point is not created within the picture plane.
Scenes can become more complex as more features are added. The illusion of space is maintained by following a structured approach for additional details.
One Point Perspective with Interiors
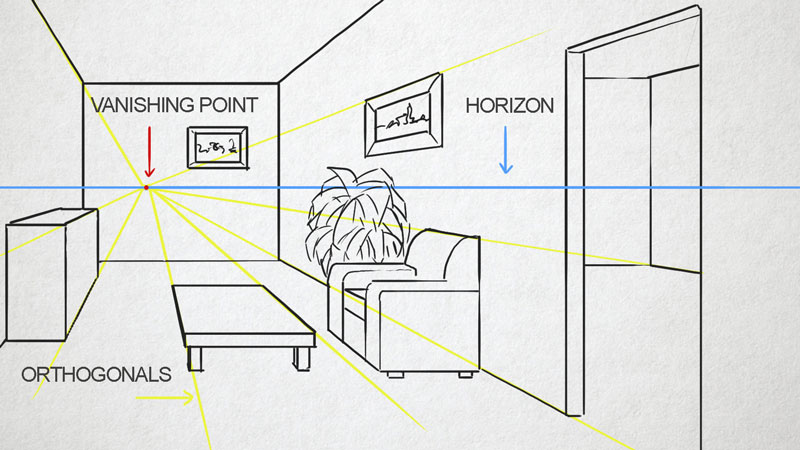
One point perspective is not limited to basic forms and buildings. It can also be used to draw interiors using the same approach. A horizon line is defined, although it most likely will not be visible in the finished drawing. A vanishing point is placed on the horizon line, before basics shapes are drawn.
Orthogonals (receding diagonal lines) are drawn to define the form of the objects extending towards the singular vanishing point.
Use in a Drawing or Painting
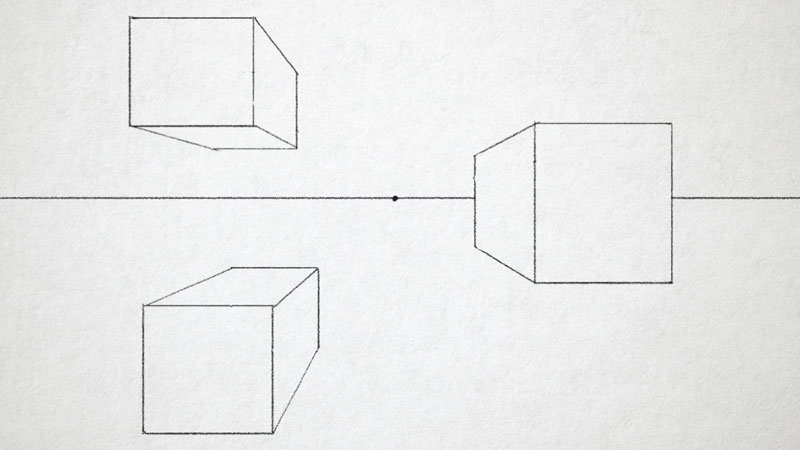
One point perspective is used by an artist when the vantage point of viewer is relatively flat, meaning that the front-facing view of the objects form flat geometric shapes (i.e. square, rectangle, etc.) If the corner of the object faces the viewer, then two point perspective or three point perspective would be a better choice.
How to Draw in One Point Perspective Step by Step

Begin one point perspective by drawing a horizon line.

The next step in one point perspective is to place a vanishing point on the horizon line.

Next, draw a box to represent the building that you want to draw in perspective.


Next, draw a smaller box that touches each of the lines that you drew in the previous step.

Now you can erase the lines that you no longer need to reveal a 3D form.

Comments
Post a Comment