
Two Point Perspective

What is Two Point Perspective?

Two point perspective drawing is a type of linear perspective.  Linear perspective is a method using lines to create the illusion of space on a 2D surface.  There are three types of linear perspective.  One point perspective uses one vanishing point placed on the horizon line.  Two point perspective uses two points placed on the horizon line.  Three point perspective uses three vanishing points.


Two point perspective examples

Linear perspective is one of the six ways to create the illusion of space on a two-dimensional surface. All forms of linear perspective involve the horizon line, vanishing point(s), and lines of perspective that recede or advance to the vanishing point(s).  Each form of linear perspective is named for the number of vanishing points used in the drawing.  Therefore, two point perspective uses two vanishing points.

How Two Point Perspective Works in a Nutshell

Two point perspective starts by defining the horizon line.  This line theoretically represents the line that divides the sky from the ground.  However, with many perspective drawings, this line is implied and instead represents the eye-line or "line of sight" of the viewer. 

Vanishing points placed on the horizon line

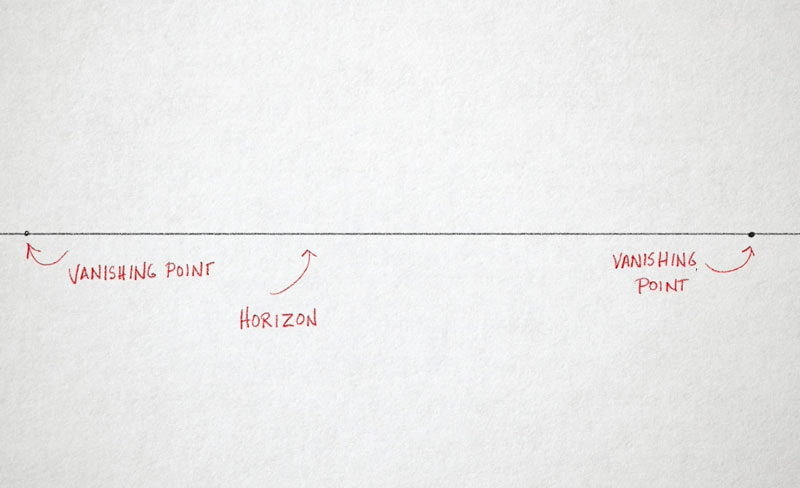
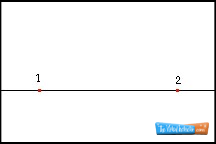
Once the horizon line has been established, the vanishing points are placed.  The vanishing point is defined as a point placed on the horizon line where objects begin to disappear because of distance.  A good way to think of the vanishing point is by imagining yourself standing on a beach. Looking both directions, you can see endlessly down the beach. At some point, people on the beach walking away from you will become progressively smaller until they completely disappear at the horizon line. 

With two point perspective, two vanishing points are placed on the horizon line.  These two points should be spaced out from each other to prevent distortion.  Both vanishing points need not both be within the picture plane, just as long as they are found on the horizon line, which continues on off of the picture plane in both directions.

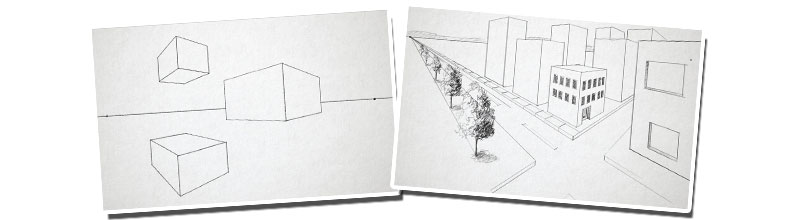
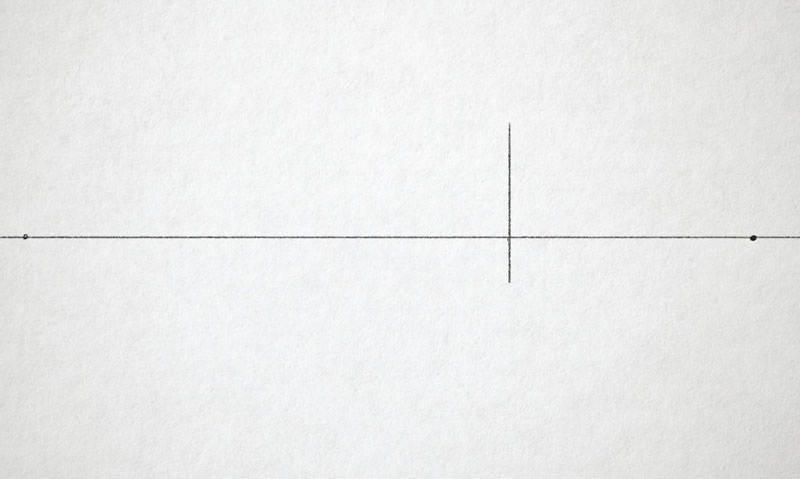
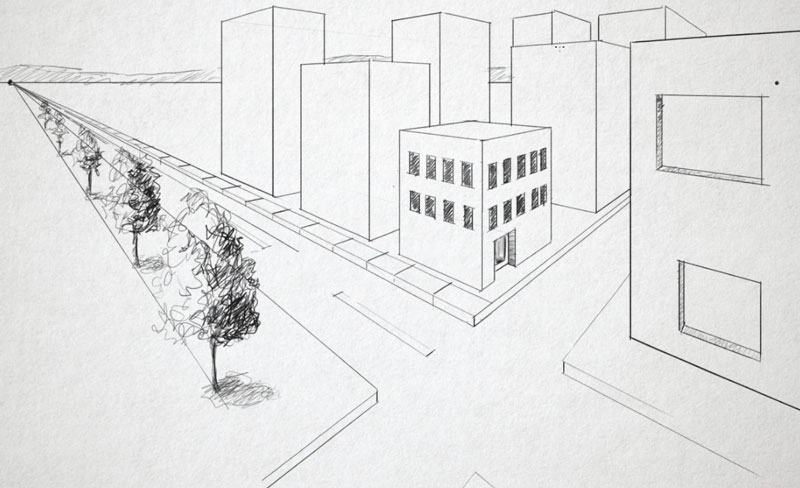
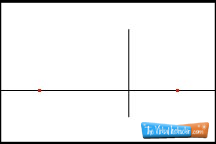
The next step is to draw the corner of the object.  Most commonly, two point perspective is used for drawing buildings or interiors, so this line could be the corner of a building. This line is drawn in between the two vanishing points and can cross over the horizon line.

Draw the corner for two point perspective

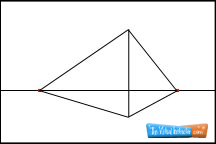
Receding lines are next drawn from each end of the corner to each one of the vanishing points.  These lines are called orthogonal lines. Any set of parallel lines that recede away from the viewer will follow along these lines to one of the vanishing points.

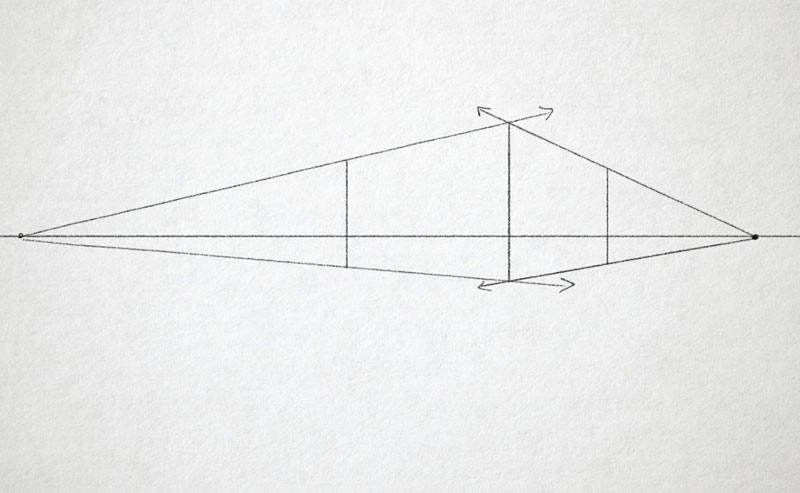
Parallel, vertical lines are drawn to indicate where the building or form ends. The closer that these lines are placed in space to the vanishing points on either side, the longer the form appears.

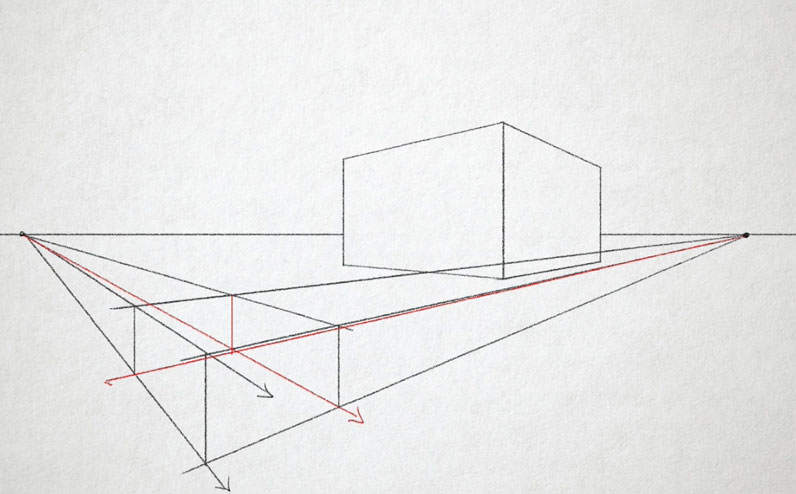
When a form is placed so that it overlaps the horizon, no additional lines are needed to define the overall form of the object. However, it is important to note that additional lines do exist. These lines are visible when the subject is placed above the horizon line or below it.

Back corner of the cube

Orthogonals extend out from each end of the form and line up with the opposite vanishing point. The location of intersection that occurs defines the the back corner of the cube, which is drawn using a vertical line.

Below the Horizon Line

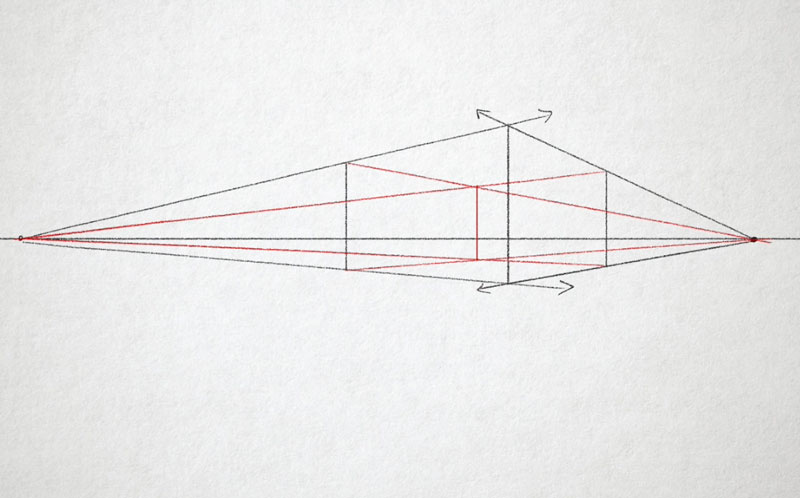
For forms placed below the horizon line the steps remain the same. However, the top of the form will be visible. This means that the top portion of the form will be defined by the orthogonal lines that extend from each end to the opposite vanishing point.

Orthogonal lines below the horizon

Here again, some of the lines are not visible in the finished drawing (red lines). It is important to note that the locations of where these lines intersect define the back corner of the cube.

Above the Horizon Line

For forms placed above the horizon line, the same steps are followed. In this case, the bottom portion of the form is now visible to the viewer. The bottom portion is defined by extending lines from each end of the cube to the opposite vanishing point.

Two point perspective above the horizon line

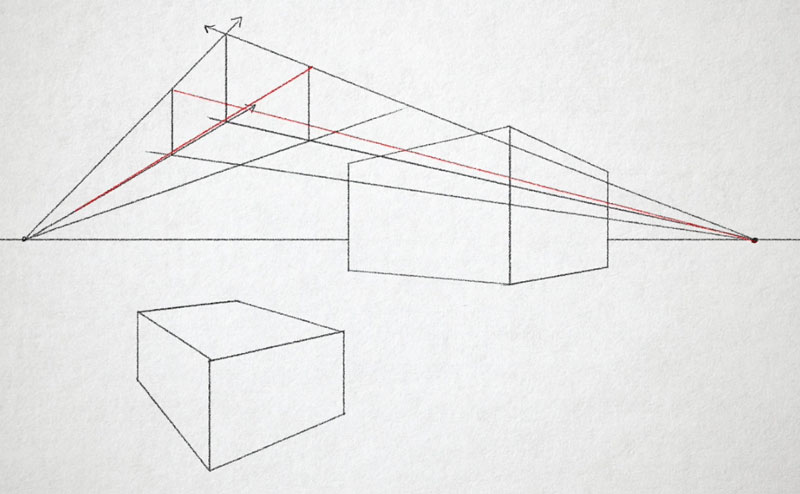
As is the case with the other examples, additional lines (red lines) exist but are not visible in the finished drawing. When complete, all lines that are no longer needed can be erased revealing the illusion of 3D forms in space.

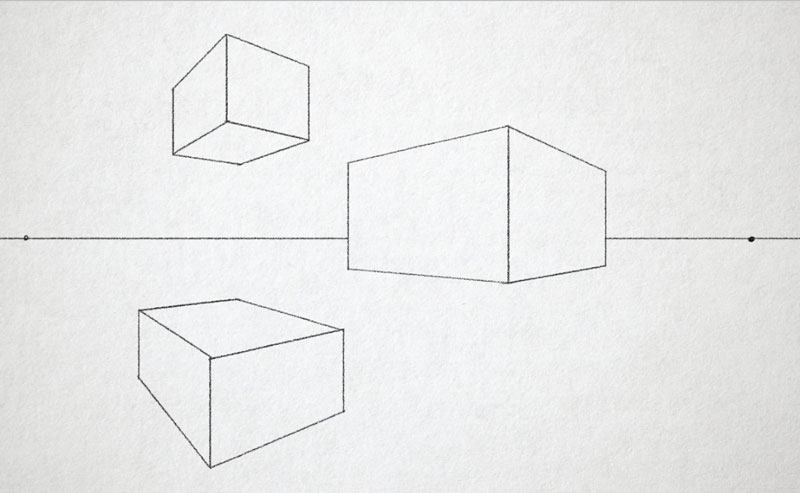
Adding Additional Details

Additional details can be added to a scene to create limitless possibilities. Vertical lines are drawn to indicate edges and corners, while orthogonal lines are drawn for parallel edges that recede into space.

Which Type of Perspective Should Be Used?

The type of linear perspective used by the artist depends largely on the vantage point of the viewer. If the view of most of the geometric shapes in the scene are "flat", then one point perspective may be the best choice. If the corners of objects are prevalent, then two point perspective may be the best solution. If the view is extreme, from above or below, then the best choice may be to use three point perspective.

Simple Breakdown of a Form Placed on the Horizon Line

Step One: Define the horizon line and the vanishing points.

Two point perspective step two

Step Two: Draw the corner of the object in between the vanishing points.

Two point perspective step three

Step Three: Draw lines from each end of the corner to each of the vanishing points.

Two Point perspective step four

Step Four: Draw parallel, vertical lines to indicate where the object ends.

Two Point perspective step five

Step Five: Erase the lines you no longer need to reveal your 3D form.

Two point perspective step six

Comments

Post a Comment

Popular posts from this blog

Arts of Indus Valley Civilization

The arts of Indus Valley C ivilization , one of the earliest  civilizations  of the world, emerged during the second half of the third millennium (Bronze Age).   The forms of art found from various sites of  civilization  include sculptures, seals, pottery,  gold  ornaments, terracotta figures, etc.   Their delineation of human and animal figures was highly realistic in nature.   Modelling of figures was done in an extremely careful manner.   Two major sites  of Indus Valley civilization, along the river Indus are:            North – cities of  Harappa;            South –  Mohenjo-Daro.   The site showcase one of the earliest examples of civic planning.   Houses, markets, storage facilities, offices, etc. arranged in a  grid-like pattern .   In this pattern, roads were cut across one another in 90-degree angle and the city was divided...

Arts of the Mauryan Period

Sixth century B.C. marks the beginning of new religious and social movements in the Gangetic valley in the form of Buddhism and Jainism (Sraman/ Shraman Tradition ). Magadha emerged as a powerful kingdom and consolidated its control over the other religions. By the third century, a large part of India was under Maurya control. Ashoka emerged as the most powerful king of the Maurya dynasty. Religious practices had many dimensions during this period. Worship of Yakshas and Mother Goddess was prevalent during that time. Yaksha worship was very popular before and after the advent of Buddhism and it was assimilated in Buddhism and Jainism. Construction of stupas and viharas (dwelling place of monks) became part of the Buddhist tradition. However, in this period, apart from stupas and viharas, stone pillars, rock cut caves and monumental figure sculptures were carved in several places. Pillars Even though constructing pillars are very old, Mauryan pillars are different from the pillars in th...

Indian Architecture after the Mauryan Period

From the second century BCE onwards, various rulers established their control over the vast Mauryan Empire: the Shungas, Kanvas, Kushanas and Guptas in the north and parts of central India; the Satavahanas, Ikshavakus, Abhiras, Vatakas in southern and western India. The period also marked the rise of the main Brahmanical sects such as the Vaishnavas and Shaivas. Places where important sculptures are seen Some of the finest sculptures of this period are found at Vidisha, Barhut (M.P), Bodhgaya (Bihar), Jaggaypetta (Andhra Pradesh), Mathura (UP), Khandagiri-Udayagiri (Odisha), Bhaja near Pune (Maharashtra). Barhut Barhut sculptures are tall like the images of Yaksha and Yakshini in the Mauryan period. Modelling of the sculpture volume is in low relief maintaining linearity. Relief panels are depicted by narratives and clarity in the narratives are enhanced by selecting main events. Narrative panels are shown with fewer characters, but as the time progress, apart from the main character i...

NIFT : National Institute of Fashion Technology

NIFT was set up in Delhi in year 1986 under the Ministry of Textiles ,Government Of India.It is one of the premiere institutes for fashion designing in India.At the time of its establishment it had only one program which was Fashion Design but in the later years various degree programs were added in the curriculum.It also has faculty and curriculum support from Fashion Institute of Technology ,Manhattan,New York. It has 16 functioning campuses all around India. Currently NIFT has 16 centers all around India and 2 centeres are proposed and under development. The Information about various campuses and the courses they offer has been described in the following videos. Do have a look at these Campus Tour Videos : NIFT DELHI NIFT MUMBAI NIFT BENGALURU NIFT GANDHINAGAR NIFT KANNUR NIFT CHENNAI NIFT HYDERABAD NIFT PATNA NIFT BHUBANESHWAR NIFT KOLKATA NIFT  KANGRA NIFT BHOPAL NIFT JODHPUR NIFT RAEBARELI...

ONE POINT PERSPECTIVE

What is One Point Perspective? One point perspective is a type of linear perspective. Linear perspective relies on the use of lines to render objects leading to the illusion of space and form in a flat work of art. It is a structured approach to drawing. One point perspective gets its name from the fact that it utilizes a single vanishing point. Other forms of linear perspective include two point perspective and three point perspective. Each type gets its name according to how many vanishing points are used. The scene usually dictates which type of perspective is used by the artist. It should be noted that not all forms of perspective are linear. Atmospheric perspective is used to create the illusion of space by manipulating the use of value and color in a scene. Often atmospheric perspective is used in tandem with a form of linear perspective to create a convincing illusion. Although linear perspective is an effective way to create depth in a scene, it is only one of the...